The 21st Century Adapted Classroom
For over 20 years, AbleNet has been guided by the line of thinking that every student, regardless of ability, can participate, communicate, learn and show measurable progress. Creating a classroom environment that offers a variety of accessible classroom-ready solutions will provide opportunities to increase communication, social skills, problem solving skills, while building independence.
Explore the benefit of creating 21st century classrooms in your school by selecting from the variety of available AbleNet solutions.


See how it works! Press or Click on the numbers in the diagram!
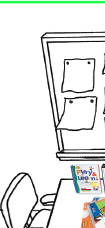
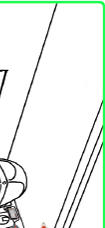
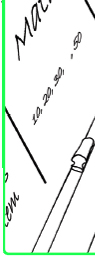
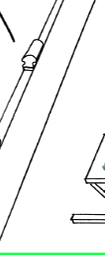
The diagram provides you with a sample of classroom layout for using assistive technology.
It is appropriate for many educational settings, and can easily by adapted to suit your needs. Self-contained classrooms may choose to duplicate this layout, while inclusive settings can incorporate the set up examples into the classrooms.

1. ENTRANCE
Make “Hello” and “Goodbye” part of your classroom routine.
Record each message into a Talking Brix Communicator.
Mount them where they can be activated by everyone going in and out of the door.
![]()
back to the top

2. PROJECT TABLE
Go Wireless!
Plug an electrical appliance into the PowerLink 4 Control Unit to create a permanent vocational skills center.
Activate appliances using the Jelly Beamer wireless switch, a Mini Beamer Transmitter or a combination of both Mini Beamer Transmitter and an alternative switch. For battery powered simple on/off devices try a complete Mini Beamer Wireless Switch Latch and Timer and Battery Device Adapters AA or Battery Device Adapters C/D
![]()
back to the top

3. CLASS INSTRUCTION
Participate in the lesson!
Record messages on the SuperTalker and LITTLE Step-by-Step with Levels Communicator to support students communication opportunities during classroom instruction.
![]()
back to the top
 4. WHITE BOARD
Get set for the day!
Record the daily schedule into the Talking Brix Communicators to visually share the class schedule.
Prepare students for the day.
![]()
back to the top
 5. LITERACY AREA - TOP SHELF
Read a story!
Regularly record the BIG Step-by-Step Communicator with each page of a story and place on a bookshelf.
Staff and students can use them at a moments notice.
![]()
back to the top
 6. LITERACY AREA - BOTTOM SHELF
Ask for help!
Record the LITTLE Step-by-Step Communicator or a QuickTalker S and mount it to the bookshelf.
Build your student's independence and increase their literacy opportunities.
![]()
back to the top
 7. CALENDAR CENTRE
Morning meeting activities!
Set up the All-Turn-It Spinner and LITTLE Step-by-Step Communicator to assist students in participating in the daily calendar activities.
Activate the Spinner using the Jelly Beamer wireless switch or Mini Beamer Wireless Switch Latch and Timer.
![]()
back to the top
 8. COMPUTER CENTRE
Access for all!
Using the many choices of keyboard options from Chester Creek Technologies and My-Board lc keyboard students will interact with an easy-to-read and fun keyboard to increase their computer skills
The Jelly Beamer wireless switch or Mini Beamer Wireless Switch Latch and Timer and the Hitch Switch Interface make a perfect pair for switch-accessible software titles.
For those iPad activities, a Blue2 Bluetooth Switch Interface and a Suction Cup TableTop iPad Mount can create an iPad workstation.
For the ultimate classroom iAccessory, Connect can do it all.
![]()
back to the top
courtesy of Communicate AT's partner, www.ablenetinc.com
